MF0043 - Electronic Ignition Wiring
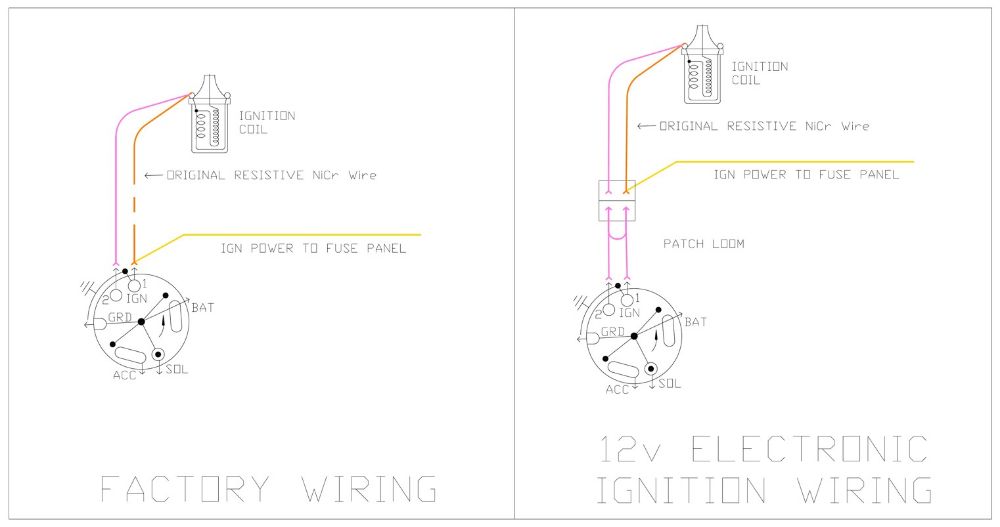
You're old Holdens most likely uses a resistive wire from the ignition switch to the coil, which dropped the voltage at the coil to around 9-10v. Fortunately, Holden also ran an additional wire to the coil that supplied a full 12 volts during cranking only. By bridging this wire at the back of the ignition switch, you can ensure you get 12 volts at the coil.
Step 1. Check Battery Reference Voltage
Before you touch anything, using a digital multi meter (set to DC Voltage) place the leads on the two terminals on your main battery while the car is running. With the engine running you should have a reading around 13.8v (approximately)
Step 2. Check the Coil Reference Voltage
While the engine is still running (with old distributor still in place) check the voltage at the coil by placing the multi meter leads Positive and Negative on the Positive and Negative terminals of the coil. If your voltage at the coil is above 12v then your car has already been converted to run 12v at the coil. You can skip to step 5.
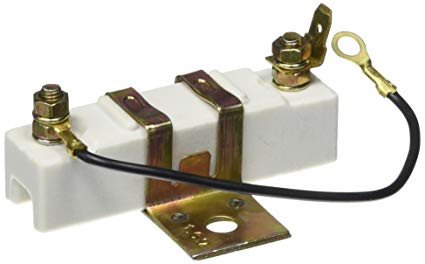
Step 3. Check for a ballast Resistor
Over the years these cars may have been fitted with a resistor at the coil. If there is a ballast Resistor present, take out the resistor inline with the coil positive wires and try step 2 again.
Step 4. Bridge the back of the ignition switch
Note: The wiring colours may vary from model to model, but pin locations are all the same.
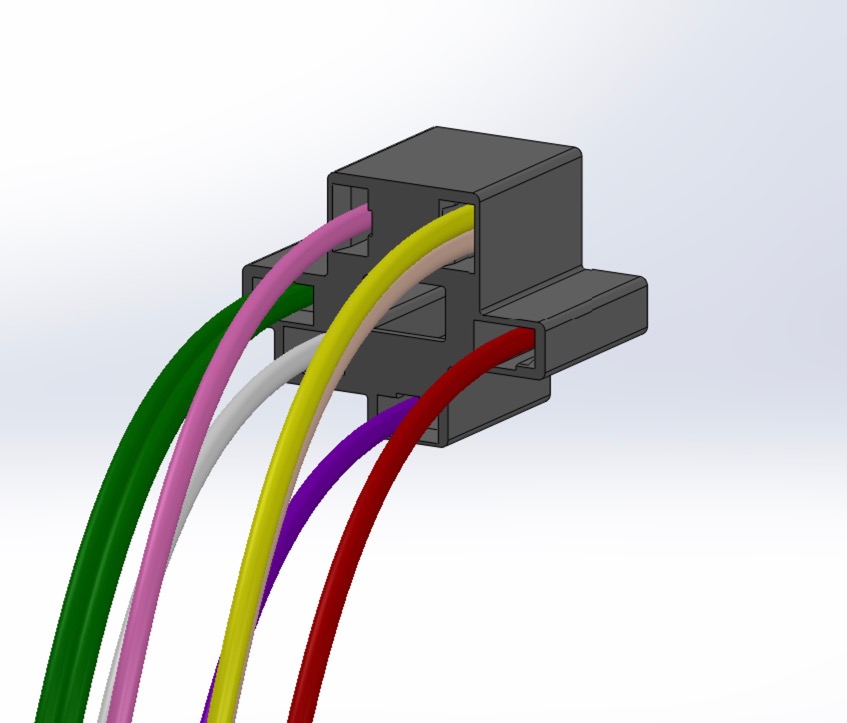
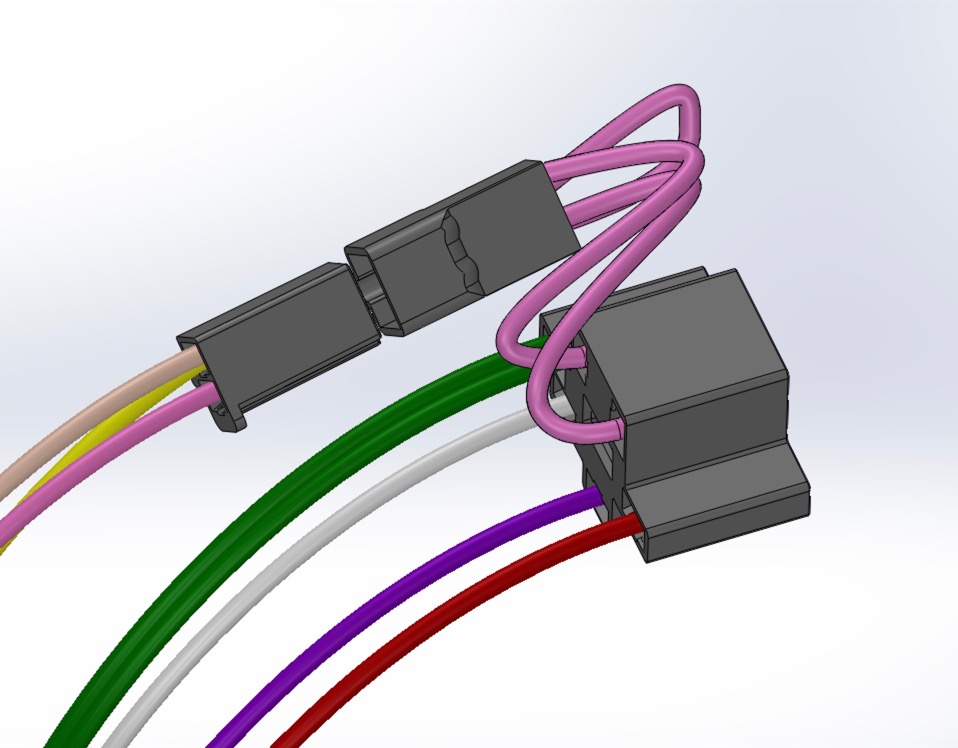
If using the Mad Folk Patch Loom, Unplug the ignition switch from under the dash and remove the two terminals from the back of the ignition switch as shown using a small screw driver or terminal removal tool. Place the two terminals into the supplied 2 way connector.
HINT: Be sure to bend the locking tab on the terminals back out after removing them from the ignition switch)
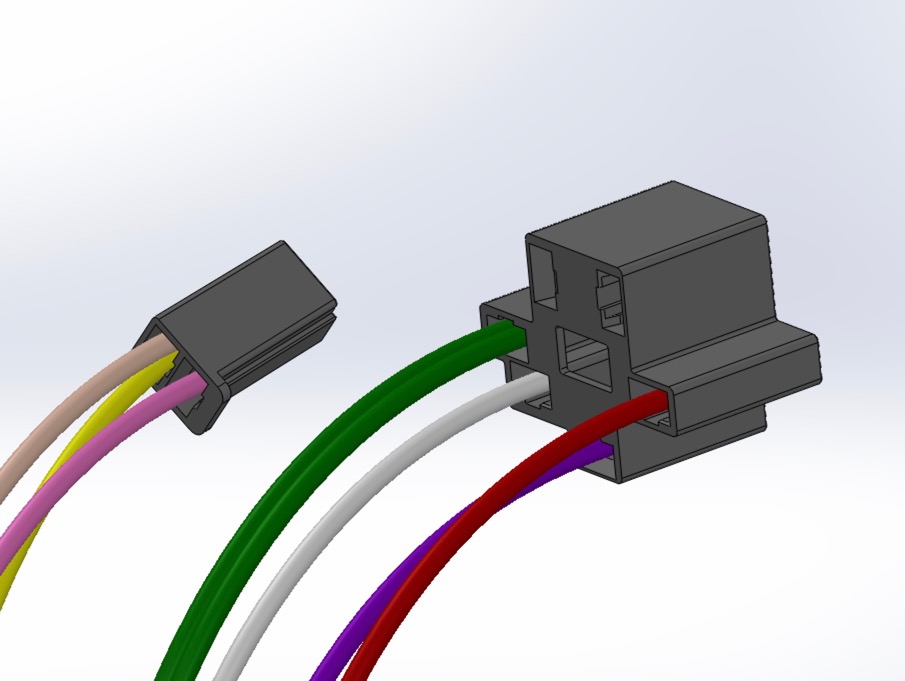
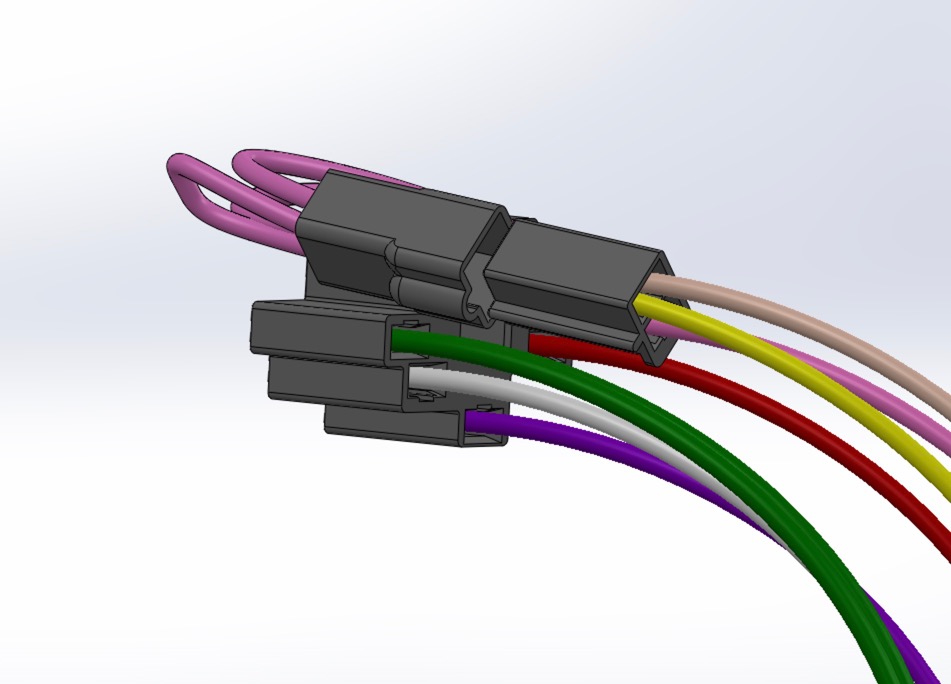
Then place the two terminals from the patch loom into the free cavities in the ignition switch as shown
 Finally, plug the patch loom into the 2 way connector
Re-Connect the ignition switch.
Step 5. Install New Coil
*** Disconnect the battery ***
Disconnect the wires on the pisitive and negative side of the original coil
Loosen the original coil clamp enough to slide the old coil out
Install new coil into posistion and tighen clamp
Step 6. Install New Distributor
1. Position the Engine:
Rotate the engine to Top Dead Center (TDC) on the compression stroke of cylinder number one. This can be done by turning the crankshaft pulley with a wrench and aligning the timing mark on the pulley with the TDC mark on the timing cover.
Confirm that the rotor inside the distributor is pointing to the number one spark plug wire position on the distributor cap.
2. Remove the Old Distributor:
Disconnect the spark plug wires from the distributor cap. Mark the wires for easy reinstallation.
Disconnect any electrical connectors or vacuum lines attached to the distributor.
Loosen the distributor clamp bolt and carefully remove the old distributor.
3. Prepare the New Distributor:
Apply a small amount of engine oil to the distributor gear to ensure smooth installation.
Place the new gasket on the distributor mounting surface.
4. Install the New Distributor:
Carefully insert the distributor into the engine block. Ensure that the rotor aligns with the number one spark plug wire position. The distributor should seat fully into the engine block.
If the distributor does not fully seat, it may be necessary to slightly rotate the rotor to engage the distributor gear with the camshaft gear.
5. Secure the Distributor:
Install the distributor clamp and bolt. Do not fully tighten the bolt yet, as you may need to adjust the distributor timing.
6. Reconnect Components:
Reconnect the vacuum lines and electrical connectors to the distributor.
Red is Positive which runs to the + terminal on the coil
Black is Negative which runs to the - Terminal on the coil
Install the distributor cap and ensure it is secured properly.
Reconnect the spark plug wires to the correct positions on the distributor cap.
7. Set the Ignition Timing:
Reconnect the negative battery terminal.
Use a timing light to set the ignition timing according to the manufacturer’s specifications. This usually involves pointing the timing light at the timing marks on the engine and rotating the distributor body to adjust the timing.
Once the correct timing is achieved, tighten the distributor clamp bolt securely.
Step 7. Final Checks
Once you are finished check the voltage at the coil when the car is running. Ideally should have battery voltage Less about 0.2 of a volt. But anywhere between 12.5-13.5v should be perfectly fine.